Installation
Java
OpenJDK 17 Installation
Download the Setup from the Adoptium Website OpenJDK Latest release, download the "Install JDK" Installer. (for example: OpenJDK17U-jdk_x64_windows_hotspot_17.0.2_8.msi)
Before starting the installation, make sure that no Oracle Java installation is present! If there is one or more, uninstall all of them first!
MSI started with a double click:
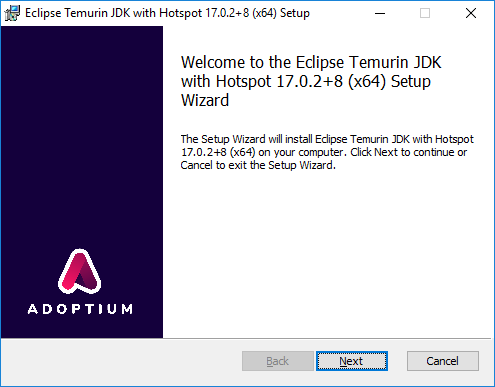
Click on "Next"
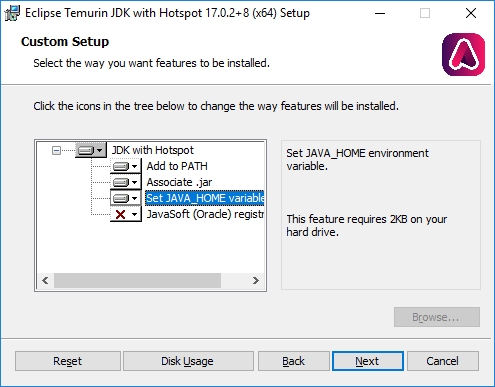
Add the Feature "Set JAVA_HOME environment variable" and click "Next"
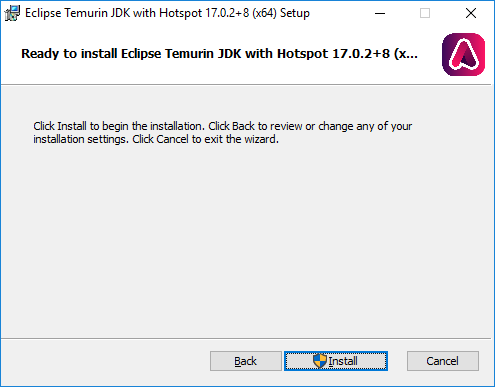
Click on "Install"
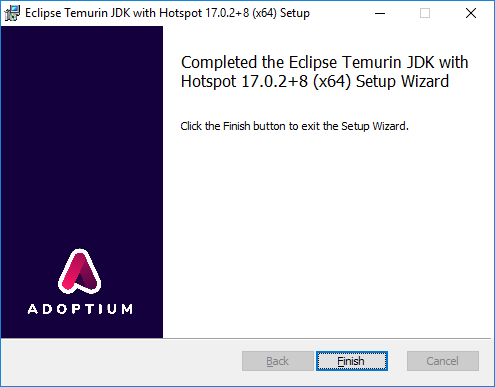
If the installation was successful
Elasticsearch
Elasticsearch 7.16.3 Installation
It's possible to install ElasticSearch silently per Commandline or by Gui
Detailed Description see: Install Elasticsearch with MSI Installer
Elasticsearch download: Download Elasticsearch
This documentation is based on version: 7.16.3 Elasticsearch 7.16.3 as MSI (BETA).
Elasticsearch 7.16.3 - GUI
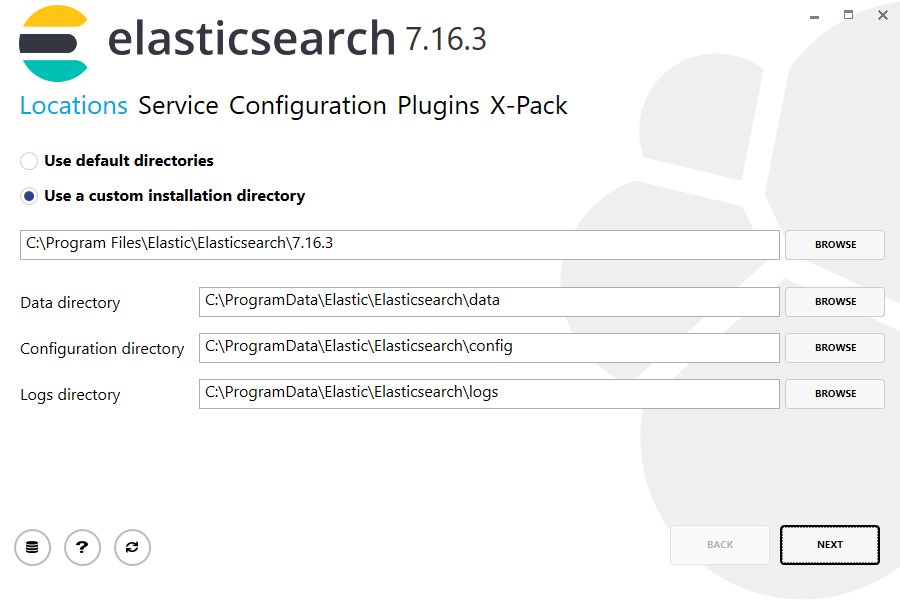
MSI started with a double click:
The installation path should remain at the pre-filled value.
The three folders (Data, Configuration, Logs) should be stored in production environments on a second partition.
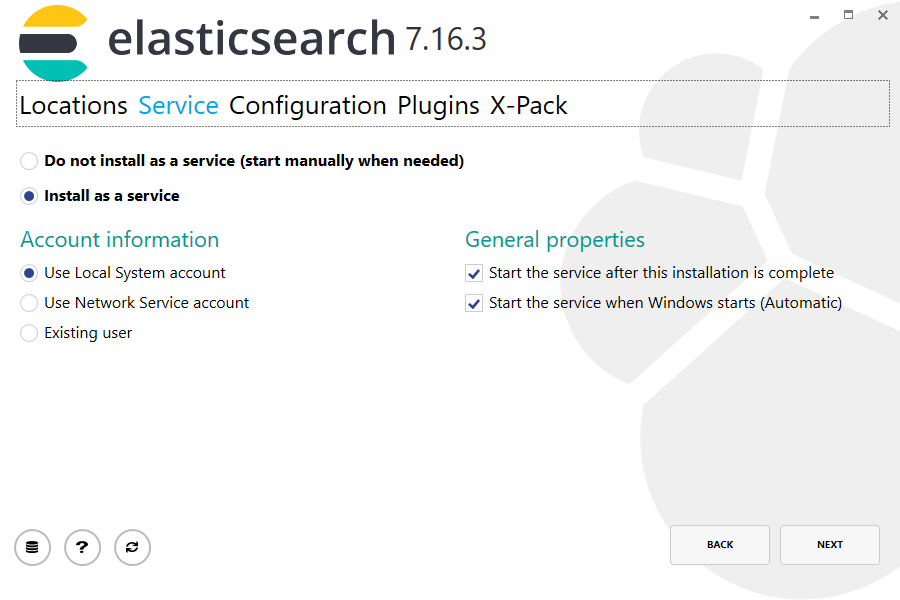
Click on "Next"
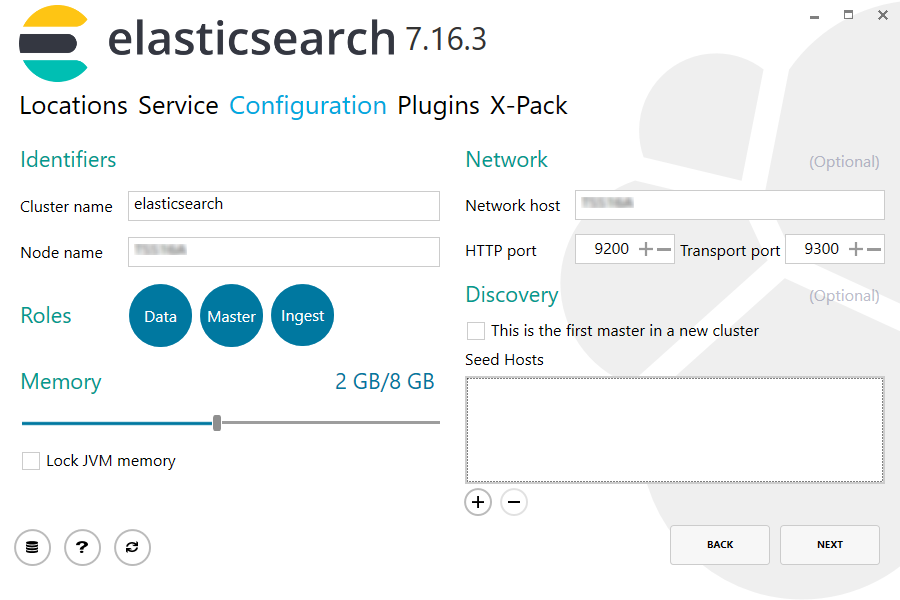
Click on "Next"
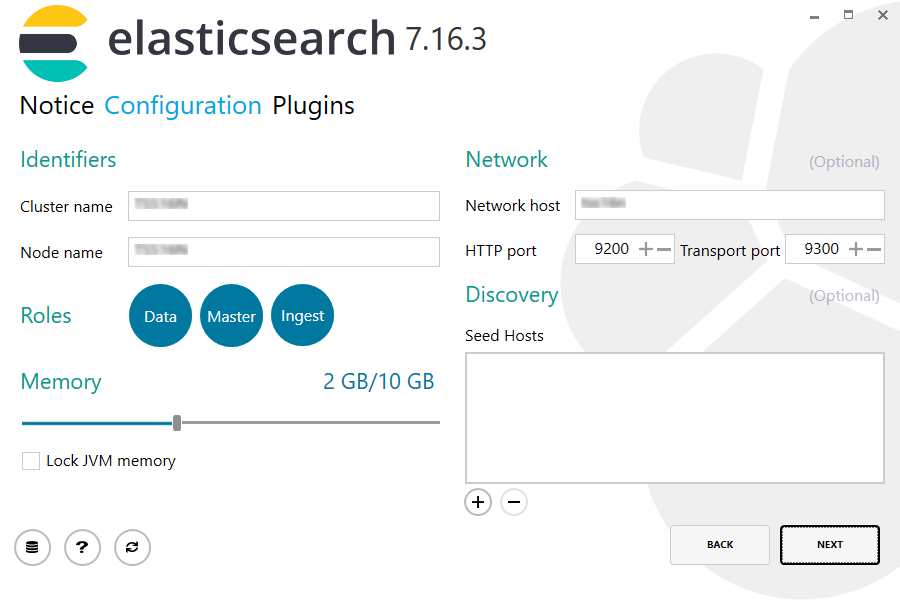
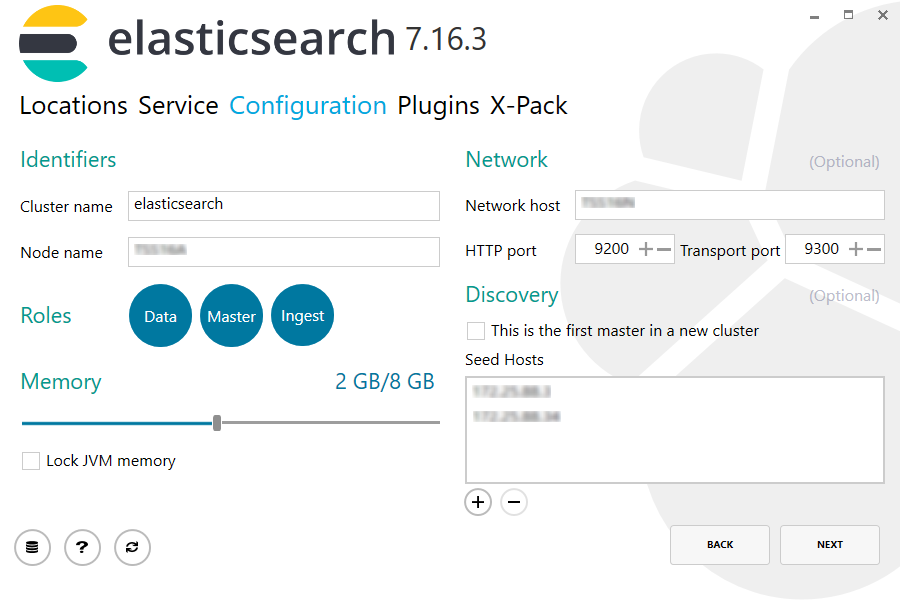
It is recommended to enter the computer name as "Network host".
Depending on how much RAM the server have available, it may be that
the Memory slider is set differently!
Depending on which other programs/services are running on this server, the "Lock JVM memory" can be selected.
At least 8GB RAM have to be set there.
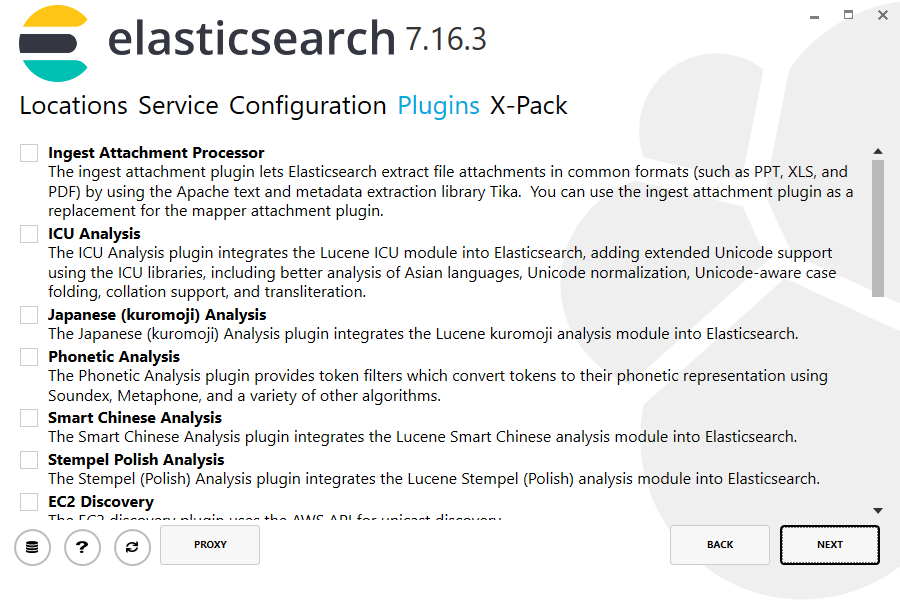
Click on "Next"
Click on "Next"
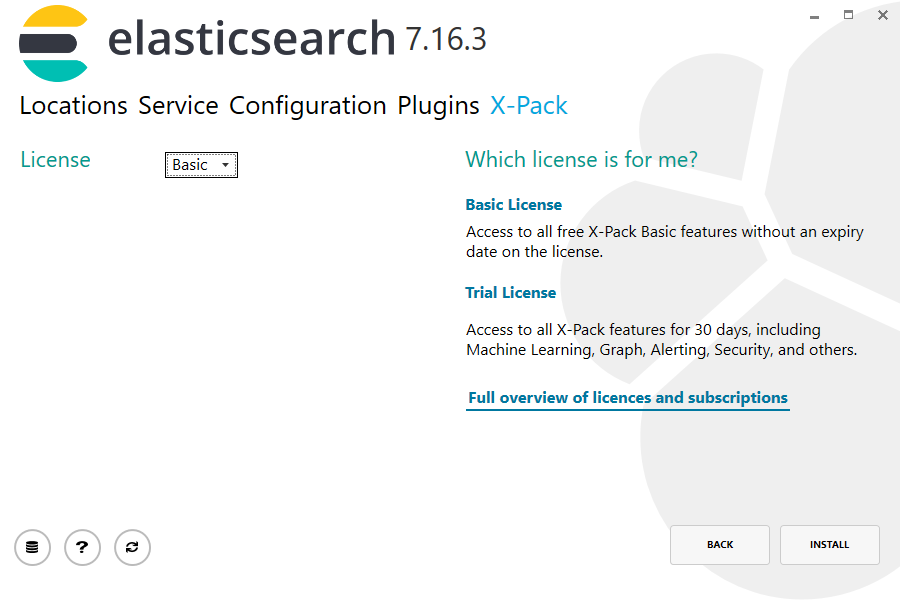
Click on "INSTALL"
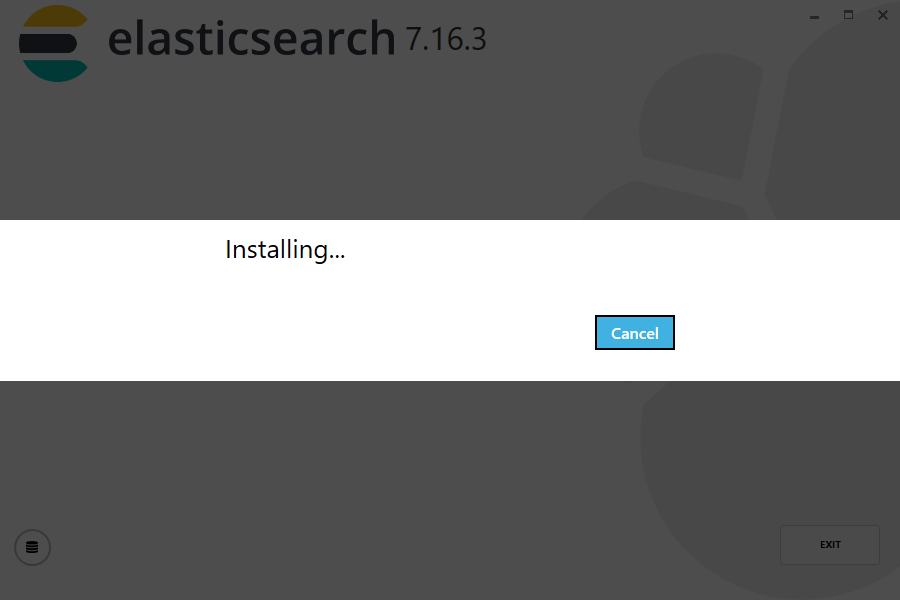
The installation will start.
Installation is finished successful.
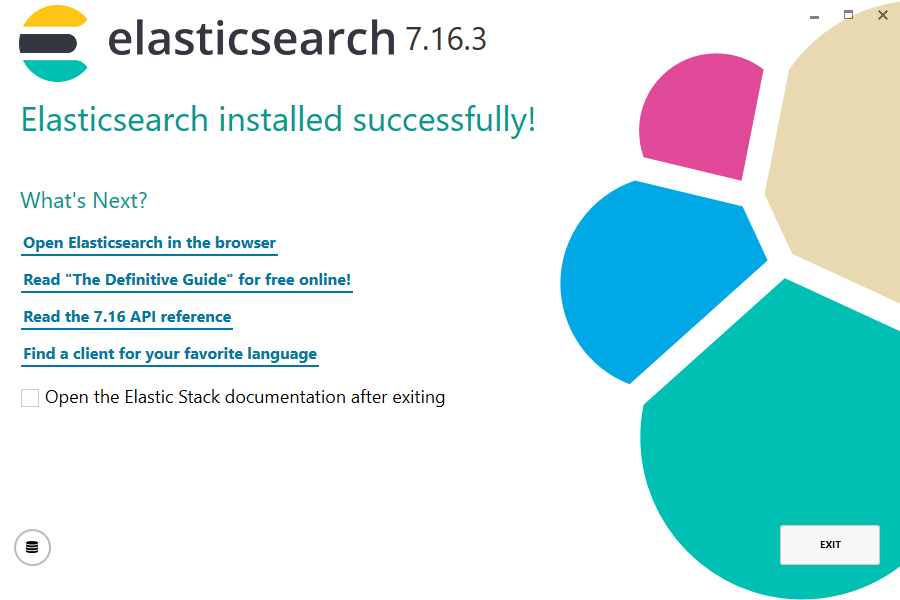
Continue with the steps after the installation!
Elasticsearch 7.16.3 - Silent
It's possible to install ElasticSearch using the MSI but without any GUI. This is required if installing it on a core server.
Open a command line as administrator, then execute this command. Here ElasticSearch will be installed with similar settings to the gui install: (change the paths as required and create them before installing)
msiexec /i "C:\Install\elasticsearch-7.16.3.msi" ^
  CLUSTERNAME="elasticsearch"                   ^
  DATADIRECTORY="D:\Elastic\Data"               ^
  CONFIGDIRECTORY="D:\Elastic\Config"           ^
  LOGSDIRECTORY="D:\Elastic\Logs"               ^
  NETWORKHOST=%COMPUTERNAME%                    ^
  HTTPPORT=9200                                 ^
  TRANSPORTPORT=9300                            ^
  XPACKLICENSE=Basic                            ^
  STARTAFTERINSTALL=false /qn /l*V "elasticsearch.log"
After starting it, the only way to get the status of the installation is by checking the logfile. If does not grow any more, the installation is probably finished. If the setup went well it will contain "Product: Elasticsearch 7.16.3 -- Installation completed successfully." or in case something went wrong it will contain "Product: Elasticsearch 7.16.3 -- Installation failed."!
Elasticsearch 7.16.3 - Steps after install
Here we did not install a cluster, therefore it's required to edit the main config file.
In this sample it's here: d:\Elastic\Config\elasticsearch.yml (depending on the settings of the installation wizard).
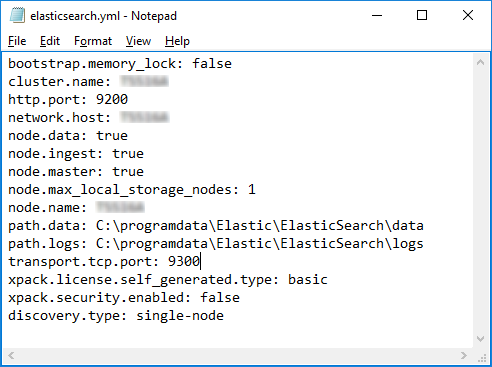
Add this setting:
discovery.type: single-node
After that you can start the service of ElasticSearch (e.g on the commandline):
net start elasticsearch
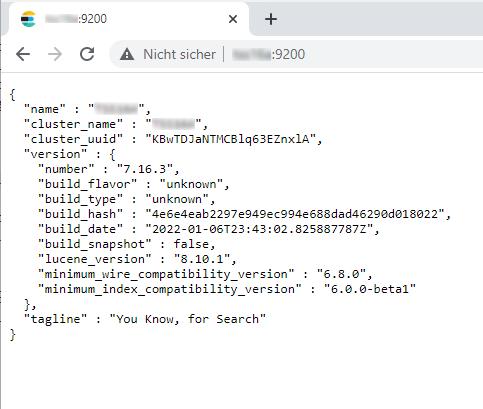
To quickly check if Elasticsearch is running, you can use Chrome or Firefox to call this URL (Internet Explorer works as well, but it will download the result as text-file instead of showing it directly):
Example: http://<host>:9200
If inPoint is not installed on the same server as Elasticsearch, both ports 9200 and 9300 TCP must be opened in the firewall.

Execute this command (as administrator)
netsh advfirewall firewall add rule name="ElasticSearch" protocol=TCP dir=in localport=9200,9300 action=allow profile=domain
To secure the service, have a look at Secure Access to Kibana and ElasticSearch
Upgrade from 7.7.1 to 7.16.3
IMPORTANT:
- Before you start read this article: Upgrade Elasticsearch
- Make sure, that no 5.x index is existing before installing (the setup will install, but ElasticSearch will not work). Migrate the index before the update!
- Make a full backup of the installation folder
- Stop indexing (inPoint.Indexer service)
- Stop Elasticsearch service
- Start Elasticsearch Setup
- Rename the "jvm.options" file (located in the config folder of ElasticSearch) to "jvm.options_backup" so that the setup can install the newer version. After the setup succeeds migrate the required settings manually to the new file. The inPoint.Wizard will do this automatically (JVM heap size settings will be migrated).
Check if all values are correctly loaded from the previous installed version.
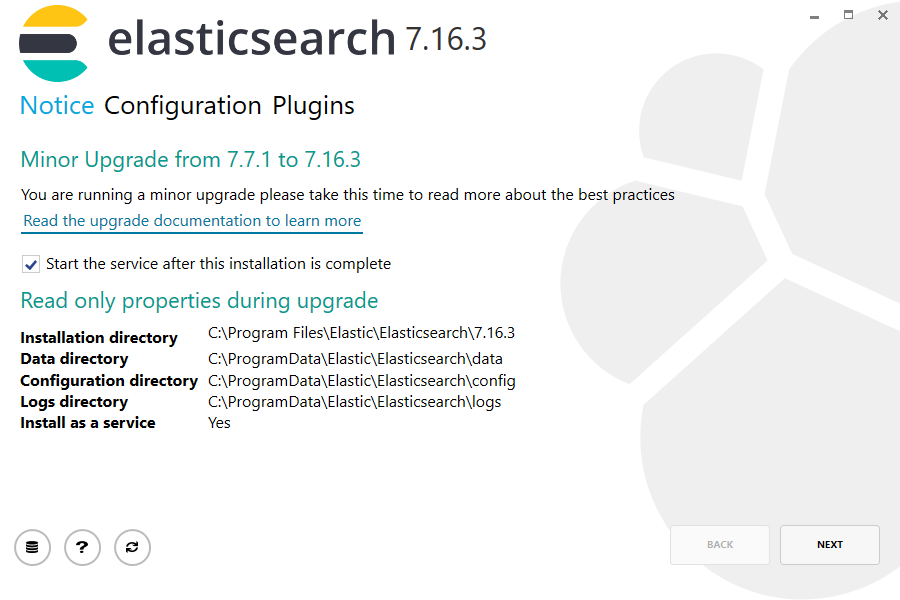
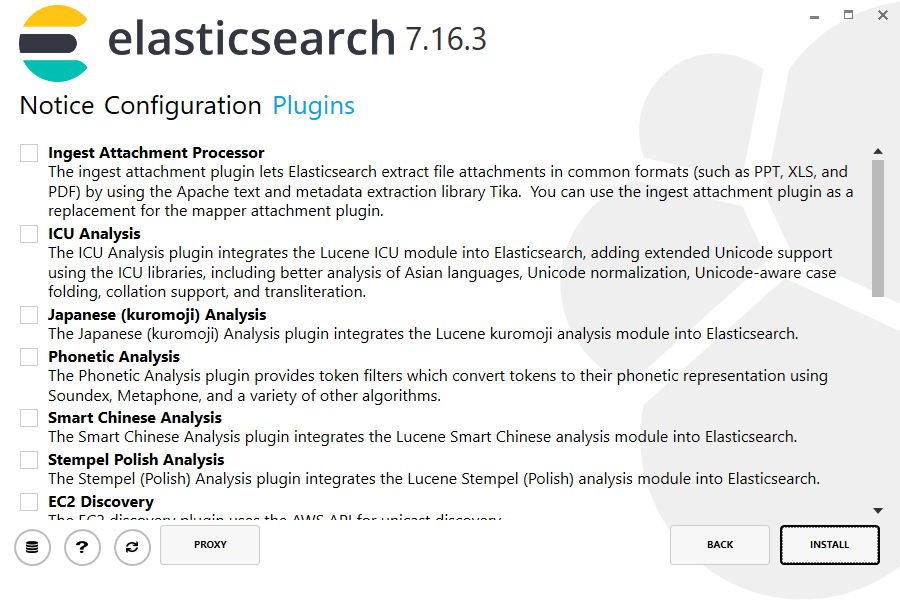
No plugin is required here.
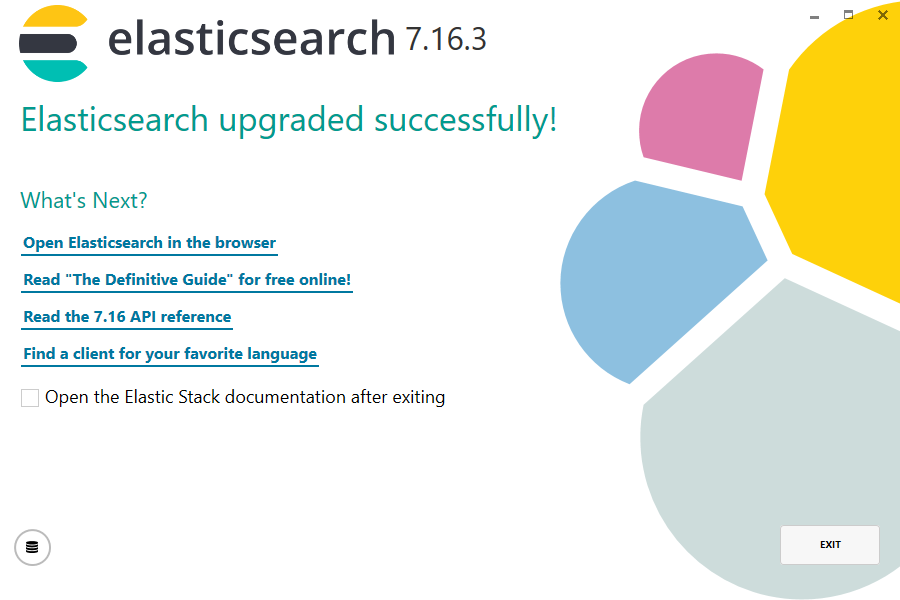
Installation is finished successful.
Passwords
Elasticsearch is now upgraded, depending on how the previous version was installed, passwords still have to be set.
- If an anonymous login was possible before, it is still possible.
- If the login is no longer possible, the passwords must be set. Before this can be done, Kibana must be upgraded as well!
Upgrade from 7.10.2 to 7.16.3
IMPORTANT:
- Before you start read this article: Upgrade Elasticsearch
- Make a full backup of the installation folder
- Stop indexing (inPoint.Indexer service)
- Stop Elasticsearch service
- Start Elasticsearch Setup
- Rename the "jvm.options" file (located in the config folder of ElasticSearch) to "jvm.options_backup" so that the setup can install the newer version. After the setup succeeds migrate the required settings manually to the new file. The inPoint.Wizard will do this automatically (JVM heap size settings will be migrated).
Check if all values are correctly loaded from the previous installed version.

No plugin is required here.
Installation is finished successful.
Passwords
Elasticsearch is now upgraded, depending on how the previous version was installed, passwords still have to be set.
- If an anonymous login was possible before, it is still possible.
- If the login is no longer possible, the passwords must be set. Before this can be done, Kibana must be upgraded as well!
Steps after the upgrade
Here we did not install a cluster, therefore it's required to edit the main config file.
In this sample it's here: C:\Elasticsearch\Config\elasticsearch.yml (depending on the settings of the installation wizard).
Add this setting:
discovery.type: single-node
After that you can start the service of ElasticSearch (e.g on the commandline):
net start elasticsearch
To quickly check if Elasticsearch is running, you can use Chrome or Firefox to call this URL (Internet Explorer works as well, but it will download the result as text-file instead of showing it directly): http://<host>:9200
Example: http://<host>:9200
The update of Elasticsearch is now finished, the search and the indexing would work now!
The next step is to upgrade Kibana.
Kibana
Kibana 7.16.3 Installation
Detailed Description see: Install Kibana on Windows
Kibana download: Download Kibana
This documentation is based on version: Kibana 7.16.3 as Windows (zip).
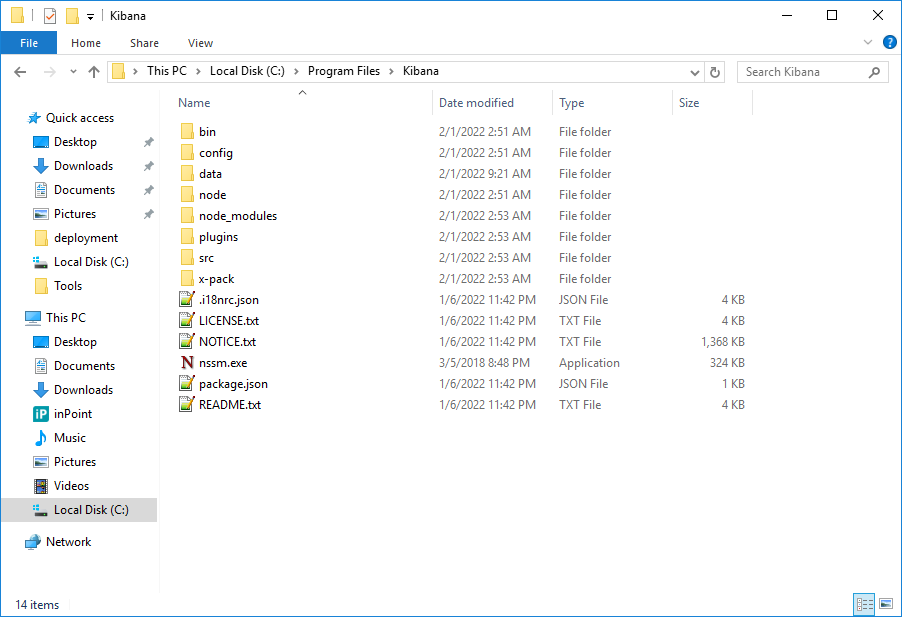
Extract the ZIP file to C:\\Program Files\\Kibana (as administrator)
To configure Kibana, the file kibana.yml must be opened. This file is located in the config folder of Kibana.
In this file the lines: server.host and elasticsearch.hosts have to be commented in and filled out correctly.

To install Kibana as a Windows service you have to download "NSSM": NSSM - the Non-Sucking Service Manager
Unzip the downloaded ZIP and browse to the folder win64.
Copy the file nssm.exe and paste it into C:\Program Files\Kibana.
Hold SHIFT key, right click on nssm.exe and select "Copy as path".
Start Command Prompt as Administrator and enter the following:
<the full path to nssm.exe (already in the clipboard)> install Elasticsearch-Kibana
Example: "C:\Program Files\Kibana\nssm.exe" install Elasticsearch-Kibana
This Window appears after enter was pressed:

Click on the "..." next to the "Path:" Line, then browse to the "Kibana/bin" folder and select kibana.bat file.
The "Startup directory" will be filled automatically:

Switch to the "Details" tab and enter the following:
- "Display name": Elasticsearch-Kibana
- "Description": Use Kibana to search, view, and interact with data stored in Elasticsearch indices.
- "Startup type": select "Automatic (Delayed Start)"

Switch to the "Dependencies" tab and enter the word "Elasticsearch".
Click on "Install service"

Installation is finished successful.

Open the Windows services and start "Elasticsearch-Kibana".

To quickly check if Kibana is running, open any Browser and call this URL: http://<host>:5601
If Kibana does not answer within 5 minutes, do the following:
- Stop
Elasticsearch-Kibanaservice - Open a Command Prompt (as Administrator) and navigate to
C:\Program Files\Kibana\bin - Write
kibana.batand press enter - Wait until
Server running at http://<host>:5601is written - Refresh the Kibana Website in the Browser and make sure Kibana is shown correctly.
- Press CTRL+C and then enter "y" in the Command Prompt
- Start
Elasticsearch-Kibanaservice
Port 5601 TCP must be opened in the firewall so that Kibana can also be reached externally.
Execute this command (as administrator)
netsh advfirewall firewall add rule name="ElasticSearch (Kibana)" protocol=TCP dir=in localport=5601 action=allow profile=domain
Secure Access to Kibana and ElasticSearch
If the Firewall rule was set without any IP restrictions, anyone who knows the Kibana URL, could access it and read/edit/delete any indices.
There are two ways to secure the communication:
- Configure the firewall so that only the inPoint Server and the Elasticsearch Server are allowed to communicate with each other.
- Set passwords in Elasticsearch.
- Enable security in elasticSearch.yml (after that, restart the ElasticSearch service (but don't start Kibana yet)
xpack.security.enabled: true
- Open a new Command Prompt (verify that the environment variable 'ES_PATH_CONF' is configured), navigate to
C:\Program Files\Elastic\Elasticsearch\7.16.3\binand then execute this commands:
elasticsearch-setup-passwords.bat interactive - Then the password must be entered several times for different internal users.
- Open the
kibana.yml(C:\Program Files\Kibana\config\kibana.yml), remove comments to enable and fill out correctly the following lines:- elasticsearch.username (if required)
- elasticsearch.password (if required)
- After a Kibana restart you can continue.
Upgrade from 7.7.1 to 7.16.3
- Stop
Elasticsearch-Kibanaservice - Backup
C:\Program Files\Kibana\config\kibana.ymlconfiguration file - Rename the folder
C:\Program Files\KibanatoKibana_Backup - Extract downloaded Kibana ZIP File to
C:\Program Files\Kibana - Open the
kibana.yml(C:\Program Files\Kibana\config\kibana.yml), remove comments to enable and fill out correctly the following lines: - server.host - elasticsearch.hosts (value was named elasticsearch.url before) - elasticsearch.username (if required)
- elasticsearch.password (if required) - Start
Elasticsearch-Kibanaservice
Elasticsearch-Kibana service
If a different installation folder was chosen during the installation, the Elasticsearch-Kibana service must be adapted. Open a Command Prompt as Administrator, browse to the Folder where the nssm.exe exists and execute this command:
nssm.exe edit Elasticsearch-Kibana
Correct all paths in the opened Window.
Upgrade from 7.10.2 to 7.16.3
- Stop
Elasticsearch-Kibanaservice - Backup
C:\Program Files\Kibana\config\kibana.ymlconfiguration file - Rename the folder
C:\Program Files\KibanatoKibana_Backup - Extract downloaded Kibana ZIP File to
C:\Program Files\Kibana - Open the
kibana.yml(C:\Program Files\Kibana\config\kibana.yml), remove comments to enable and fill out correctly the following lines: - server.host - elasticsearch.hosts (value was named elasticsearch.url before) - elasticsearch.username (if required)
- elasticsearch.password (if required) - Start
Elasticsearch-Kibanaservice
Elasticsearch-Kibana service
If a different installation folder was chosen during the installation, the Elasticsearch-Kibana service must be adapted. Open a Command Prompt as Administrator, browse to the Folder where the nssm.exe exists and execute this command:
nssm.exe edit Elasticsearch-Kibana
Correct all paths in the opened Window.
Indexer
.NET Framework 4.8 must be installed before the Indexer can be installed! Download .NET Framework 4.8
MSI started with a double click:
Select any language you like and then click "OK"

Click on "Next"

Click on "Next"

The Elasticsearch URL must be entered.
Example: http://<host>:9200
And if required, the user/password needed to connect to the Elasticsearch server.
Click on "Install"

If the installation was successful

The entered Elasticsearch URL, user name and password are written by the setup into the "inPoint.Indexer.exe.config" file.
inPoint.Indexer service was created:

The Indexer also checks our license, per default it was installed in C:\Program Files (x86)\HS Europe, copy the PAMLIC file into this folder.
Now the inPoint.Indexer service can be started.
If the indexer has successfully processed entries of the IP_FULLTEXT_QUEUE table, they are marked with STATUS = 2007.
STATUS = 0
The entries have not yet been processed by the indexer.STATUS = 100X
The entries are currently being processed.STATUS = 2XXX
The entries were processed.
The three digits after the 2XXX are a set from a flags enum. (see: inPoint.Fulltext.IndexStatus)
Here are a few that happen a lot:
STATUS = 2007
Item completely successfully indexedSTATUS = 2006Item (document) was indexed with all metadata from the DB, but no content of the file could be extractedSTATUS = 2101Item (folder) could no longer be found in the DB. None of this was indexedSTATUS = 2102Item (Share) could no longer be found in the DB. None of this was indexed
In later versions the STATUS = 2007 entries will be completely removed from the IP_FULLTEXT_QUEUE table.
NOTE: If a virus scanner is installed on the server, the temp directory used by the indexer must be excluded.
Backup and Restore
Backup
See: Elasticsearch Backing Up Your Cluster
First of all the path where the Backup should be created afterwards have to be defined. The Backup should be stored on a different hard disk than the one on which the index is written.
In this example, the Backup will be created at C:\Index\Backup.
Open the elasticsearch.yml and add this line:
path.repo: C:\\Index\_Backup
Save the elasticsearch.yml and restart Elasticsearch service
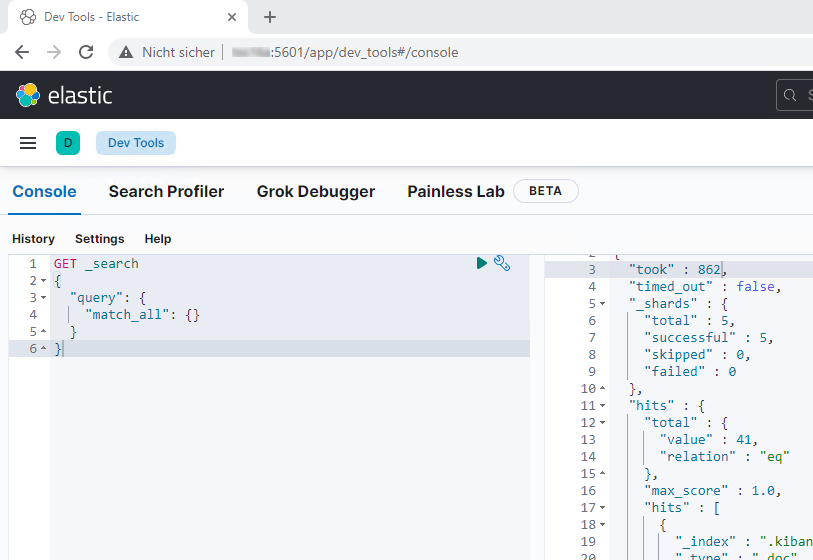
Open the Kibana "Dev Tool" Console and execute this command:
PUT _snapshot/inPoint_Backup
{
  "type": "fs",
  "settings": {
    "location": "C:\\Index_Backup"
  }
}
The Result should display:
{ "acknowledged": true }
Backup the index with this command:
PUT _snapshot/inPoint_Backup/bck_20181015
{
  "indices": "inpoint"
}
The Result should display:
{ "accepted": true}
It is also possible to specify all indices with "*" or several comma-separated.
The part "bck_20181015" can be chosen freely and should be uniquely defined for each backup operation so that the correct backup can be found in case of a restore.
Check the status of the Backup with this command:
GET _snapshot/inPoint_Backup/bck_20181015
Result:

Restore
See: Elasticsearch Snapshot and Restore
Close the currently used index:
POST inpoint/_close
Result:
{ "acknowledged": true }
Restore the Backup:
POST _snapshot/inPoint_Backup/bck_20181015/_restore
Result:
{ "accepted": true}
Open the index:
POST inpoint/_open
Result:
{ "acknowledged": true }
Cluster
Clustering can be used for performance reasons or as a safe guard against failure. (For more details: ElasticSearch Cluster)
NOTE:
- If you have two nodes the data duplication will be done automatically.
- At least 3 machines for resilience. (For more details: Availability cluster design)
- The new master node will be selected if you stop the current master node. The election is only working if you have more than half of the master eligible nodes up and running.
- If you need more nodes, then you have to add the ip adresses to the
discovery.seed_hostsproperty insideElasticSearch.ymlon all nodes.
Configuration on a existing node (installed by the wizard):
elasticsearch.ymlnetwork.host
Change to the fixed IP address of the nodediscovery.seed_hosts- add the IP addresses or DNS names of all nodes
e.g.:discovery.seed_hosts:
-172.25.88.33
-172.25.88.34- Remove
discovery.type: single-nodefrom Node1
- If necessary, open the ports in the firewall (default: 9200 and 9300)
Installation on a fresh node:
- Install OpenJDK 17 (64 Bit) JRE (see: OpenJDK 17 Installation)
- Install Elasticsearch 7.16.3.msi (located in folder
Setup\files\ElasticSearch)- At step "Configuration":
- Enter the Cluster name (must be the same for all nodes, verify
elasticsearch.ymlon an already installed node) - Enter the IP address of the current machine in "Network host"
- Add the IP addresses or DNS names of all existing and planned nodes to "Seed Hosts"
- Enter the Cluster name (must be the same for all nodes, verify
- If necessary:
- Import the license
- Open the ports in the firewall (default: 9200 and 9300)
- Install Kibana (Its not needed for the cluster functionality)
- At step "Configuration":
Monitoring
All nodes which are currently running in a cluster can be monitored in ElasticSearch with the following URL http://<host>:9200/_cat/nodes?v=true
or in Kibana under Monitoring.
ElasticSearch:
- Open
http://<host>:9200/_cat/nodes?v=true
Kibana:
- Open
http://<host>:5601/ - Click on Stack Management > Monitoring > Nodes